How to Upload Files to Your Server
Table of Contents
Bringing a world from your own PC, or dropping in a mod or a settings file, means getting files onto your server. Start with the Files tab in your browser: it takes files up to 100 MB each and can unpack a zip for you, with nothing to install. Switch to SFTP only when a file is bigger than that, or when you would rather manage the server's files from a program on your computer.
Before You Start
- A server you own. The Files and Advanced tabs belong to the owner. A server a friend has shared with you shows only Console and Backup, as covered in How to Share Your Server With a Friend.
- Any game, any plan. Both methods work the same way on every game we host. The examples use a Terraria server, whose worlds live in
saves/Worlds. - 100 MB per file on the Files tab. Anything larger is refused, so use SFTP (Method 2) for it.
- Files, not folders. The Files tab uploads files only. To upload a whole folder, zip it on your computer first and unpack it on the server (Step 3).
- Stop the server before you replace a world or save. A running server can write its own copy back over yours when it next saves or shuts down (see Troubleshooting). Click STOP on the Console tab first.
- Same name means replaced. Uploading a file with the same name as one already in the folder replaces it straight away, with no warning.
Want a copy to fall back on before you replace anything? Follow our guide: How to Back Up and Restore Your Server
Method 1: Upload in the Files Tab
Step 1: Open the Folder the File Belongs In
Open your server from your HardGaming dashboard with MANAGE SERVER, then click the Files tab. Click folder names to move into them. The path above the list shows where you are, and clicking Home in it takes you back to the top.
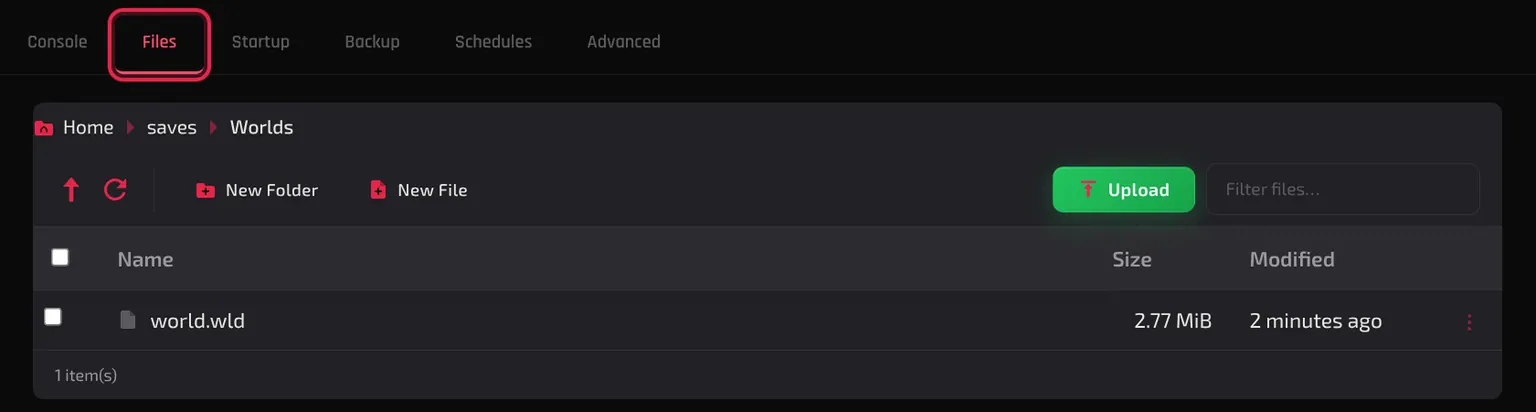
Uploads always land in the folder you have open, so check the path before you upload. If the folder you need is missing, click New Folder, type a name under Folder Name and click Create. The new folder appears inside the one you have open.
Step 2: Upload Your Files
Click Upload and choose one or more files on your computer. An Uploading Files window shows each file's progress and speed, and closes when they finish.
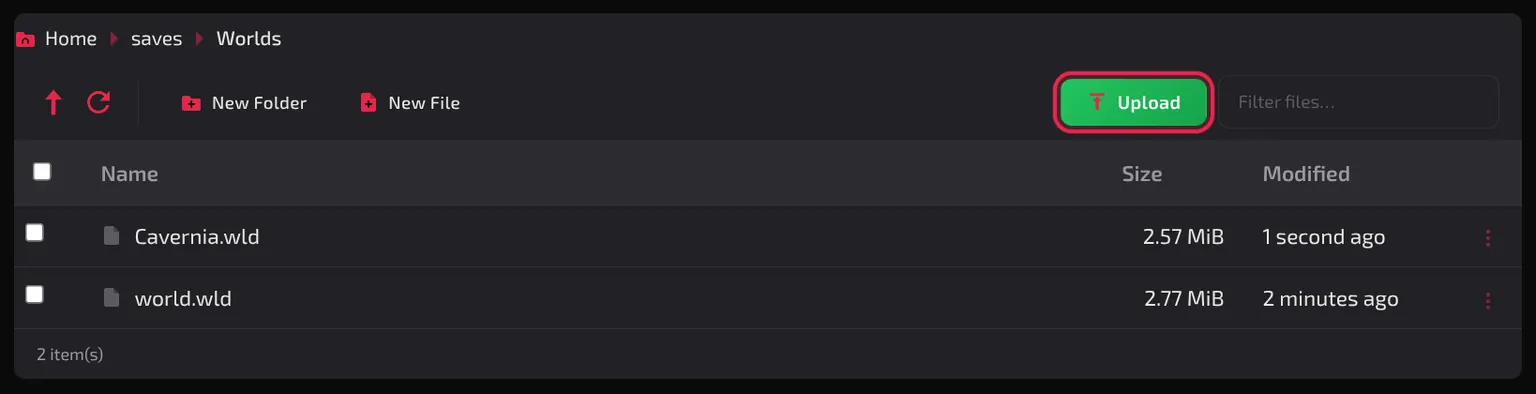
Each file appears in the list as soon as it arrives, with its size and 1 second ago under Modified. That is your confirmation, as the panel shows no separate message for a successful upload. A file over 100 MB is refused with Failed to upload 1 of 1 file: followed by its name, and is not added to the list.
Step 3: Unpack a Zipped Folder
Skip this step unless you uploaded a .zip to carry a folder across. Click the three dots at the end of the zip's row and choose Unarchive.
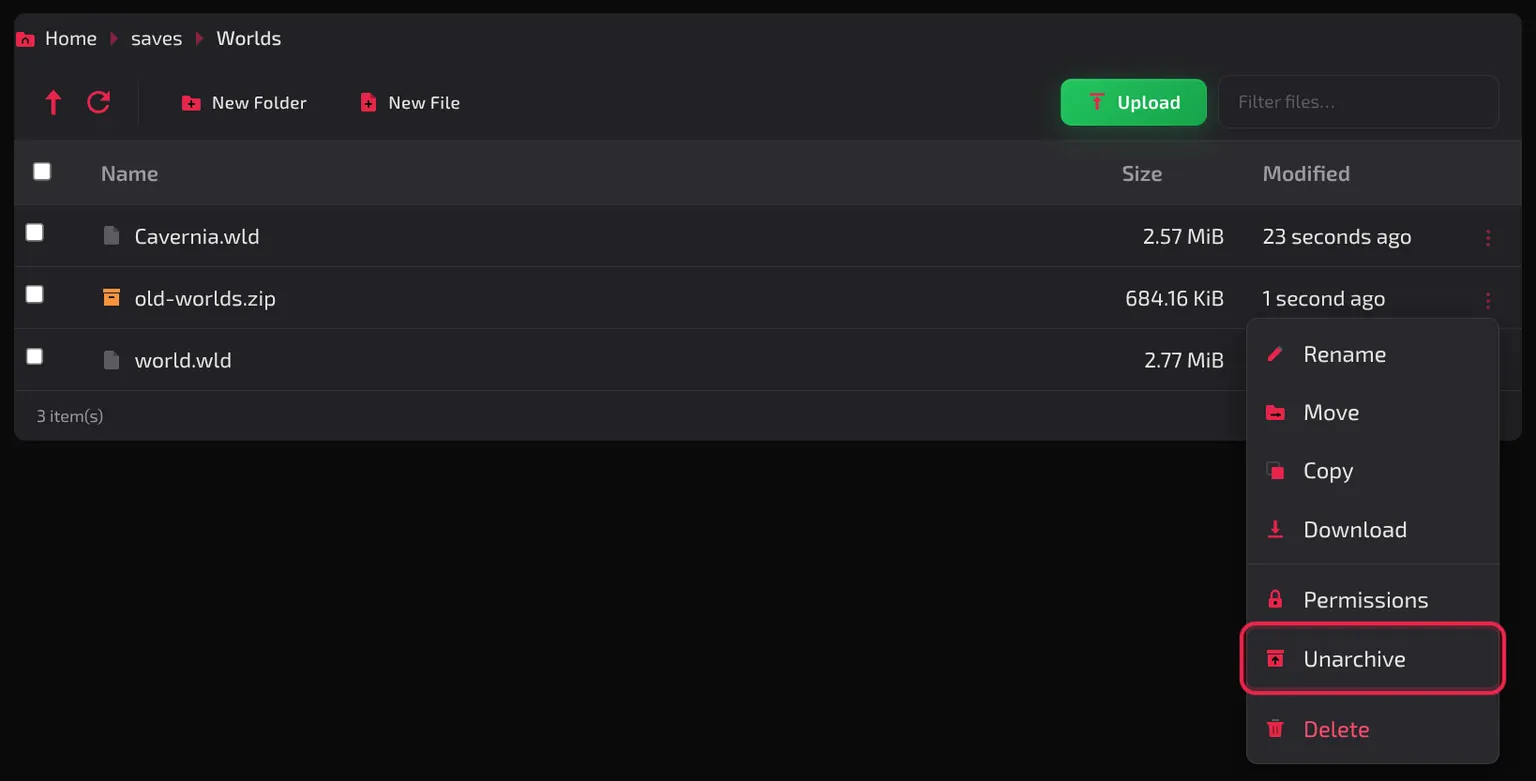
The panel confirms with Unarchived and the zip's name, and the folder appears beside the zip with its contents and any folders inside it intact. The zip itself stays, so delete it from the same menu once you have checked the folder.
Note: Leave a file as a zip if that is the form your game uses, such as a Factorio save. Only unarchive a zip you made yourself to carry a folder.
Method 2: Upload With SFTP
SFTP connects a program on your computer straight to your server's files. Use it for files over 100 MB, or for a lot of folders at once.
Step 1: Enable SFTP
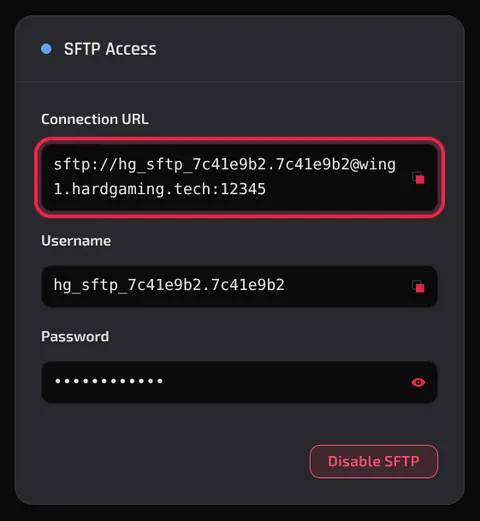
Open the Advanced tab. Under SFTP Access, click Enable SFTP.
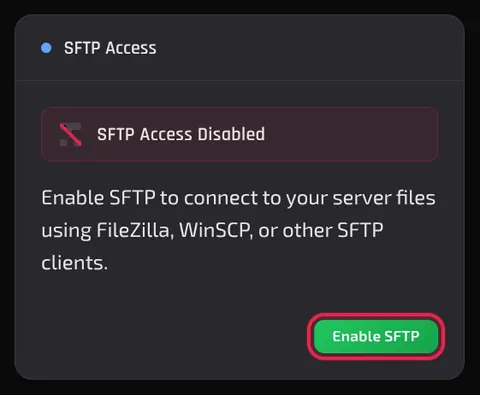
The panel confirms with SFTP access enabled successfully! and the card fills with your connection details.
Step 2: Copy Your Connection Details
The card now shows three values, each with a copy button beside it:
- Connection URL, for example
sftp://hg_sftp_7c41e9b2.7c41e9b2@wing1.hardgaming.tech:12345. It holds your username, the server address (after the@) and the port (after the last colon). - Username, the part before the
@. - Password, hidden as dots. Click the eye icon to show it, and a Copy password button appears next to it.
Step 3: Connect Your SFTP Program
Any SFTP program works. These steps use FileZilla, which is free for Windows, macOS and Linux. Download it from its own site only: filezilla-project.org.
In the bar across the top, type sftp:// followed by the server address into Host, for example sftp://wing1.hardgaming.tech. Fill in Username and Password, put the port into Port, and click Quickconnect.

If you leave Password empty, FileZilla asks for it in an Enter password window when you connect. Type it there and click OK.
The first time you connect, FileZilla shows an Unknown host key window. That is expected for a server it has never seen before. Tick Always trust this host, add this key to the cache so it does not ask again, then click OK. Your server's files then appear in the right-hand pane, starting from the same top folder as Home on the Files tab, with saves inside it.
On Windows and prefer WinSCP? Paste the whole Connection URL into its Hostname field and it fills in the rest, then click Login.
Step 4: Upload Your Files
Open the destination folder in the right-hand pane, then drag files or whole folders onto it from your computer in the left-hand pane. You can also right-click a file on the left and choose Upload. The queue along the bottom shows each file as Transferring, with its progress, time left and speed.
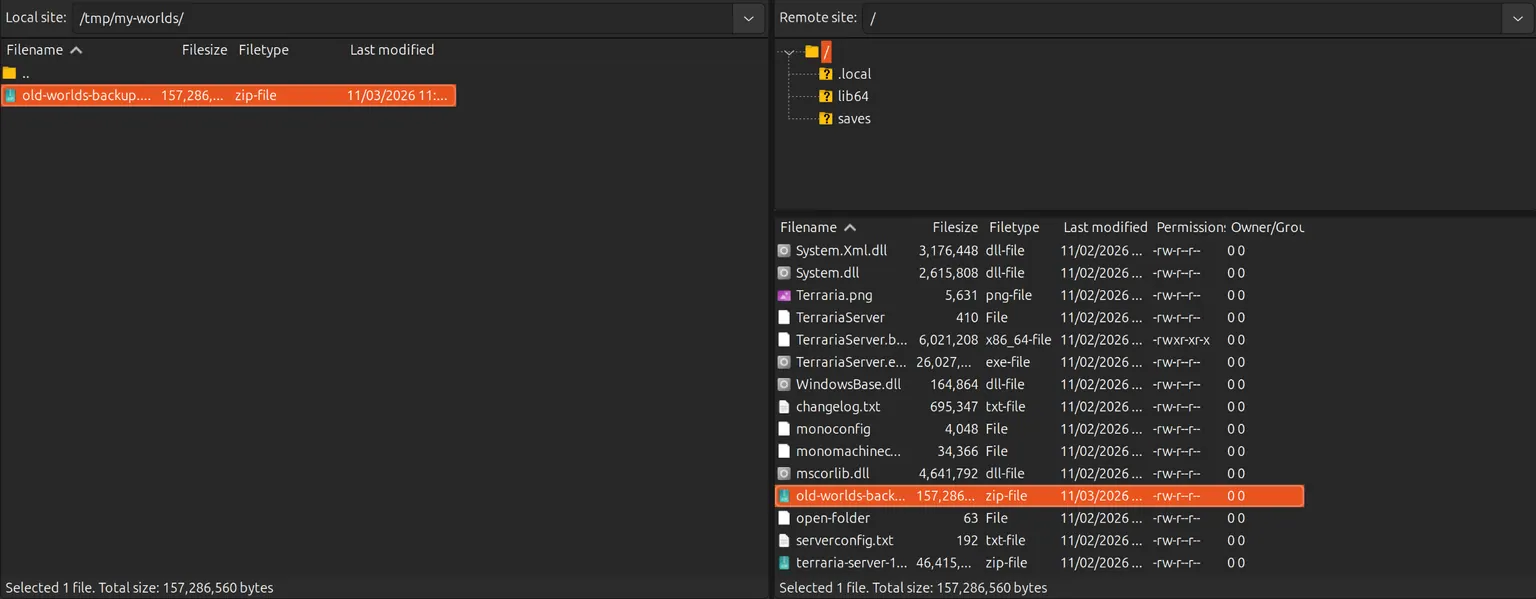
When the transfer finishes, open the same folder on the Files tab and click the refresh arrow to see the files there too.
Which Upload Method Should I Use?
Use the Files tab unless a file is over 100 MB. It needs nothing installed and unpacks zips for you. SFTP is for big files and for moving many folders at once.
| You want to | Use |
|---|---|
| Upload a world, mod or config file under 100 MB | Files tab (Method 1) |
| Upload a whole folder | Zip it, upload it on the Files tab, then Unarchive it (Method 1, Step 3), or drag it across with SFTP |
| Upload anything over 100 MB | SFTP (Method 2) |
| Edit a settings file that is already on the server | Neither. Use the Config tab, as described in How to Use Your Server Dashboard |
Troubleshooting
Upload says Failed to upload 1 of 1 file?
- The file is over 100 MB, the Files tab's limit for a single file. Upload it with SFTP instead (Method 2).
Your uploaded world or save was replaced by the old one?
- The server was running when you uploaded, and it saved its own copy over yours as it stopped. On a Terraria server, stopping after an upload printed
Saving before exit...in the console and wrote the old world back. Terraria kept the uploaded file beside it asworld.wld.bak. - Click STOP on the Console tab, upload the file again, then click START.
FileZilla says Authentication failed?
- SFTP is switched off. Open the Advanced tab, and if the card reads SFTP Access Disabled, click Enable SFTP and connect again.
Can't choose a folder to upload?
- The Files tab takes files only. Zip the folder on your computer, upload the zip, then use Unarchive (Method 1, Step 3).
Uploaded file is in the wrong folder?
- Uploads go into whichever folder was open. Click the three dots on the file's row and choose Move. Under Select Destination, click the arrows to open folders, click the folder the file belongs in, check the Moving to: line, then click Move. The panel confirms with Moved 1 item(s) to and the new path.
Best Practices
- Back up before you replace anything. Take a backup on the Backup tab first, so a wrong file is one Restore away from undone.
- Stop the server before uploading a world or save, and start it again once the upload is in the list.
- Turn SFTP off when you are done. Click Disable SFTP in the same card, and the login is refused until you click Enable SFTP again.
- Settings files belong on the Config tab. If you uploaded a settings file, add it to the Config tab and edit it there from then on. See Server Settings Reset After a Restart for why a setting can still change back.
Next Steps
- Take a tour of every tab on your server dashboard
- Back up and restore your server
- Create a missing settings file on an Abiotic Factor server
Got a world worth moving somewhere new? Browse every game we host and bring it with you.
Need Help?
If you run into any issues, the HardGaming support team is here for you:
- Forum: ask the community and search past answers
- Email: support@hardgaming.tech
- Live Chat: use the chat widget on hardgaming.tech
- Discord: join our community for quick help
Happy gaming! 🎮