Hytale: How to Set Up a Server
Table of Contents
This guide takes you from the Hytale plan picker to a paid server with its own connect address. Hytale adds one step other games do not have: the first time the server starts, it waits for you to approve it from your Hytale account before it will download the game.
Before You Start
- A HardGaming account. Sign in at hardgaming.tech first. You can pick a plan without one, but Continue to Configuration then stops with Please login first to purchase a game server.
- A Hytale account. Your new server cannot download Hytale until you approve it from your account. Keep a browser handy where you can sign in to it.
- PC players only. Hytale is in Early Access on Windows, Mac and Linux. There is no console version yet, so there is no crossplay to set up.
- At least 6GB of RAM. That is the smallest server HardGaming offers for Hytale. No plan limits your player count.
- Pick your server name carefully. It cannot be changed after you pay. Every other setting you choose at checkout appears again on the Startup tab of your server.
Step 1: Open the HardGaming Website
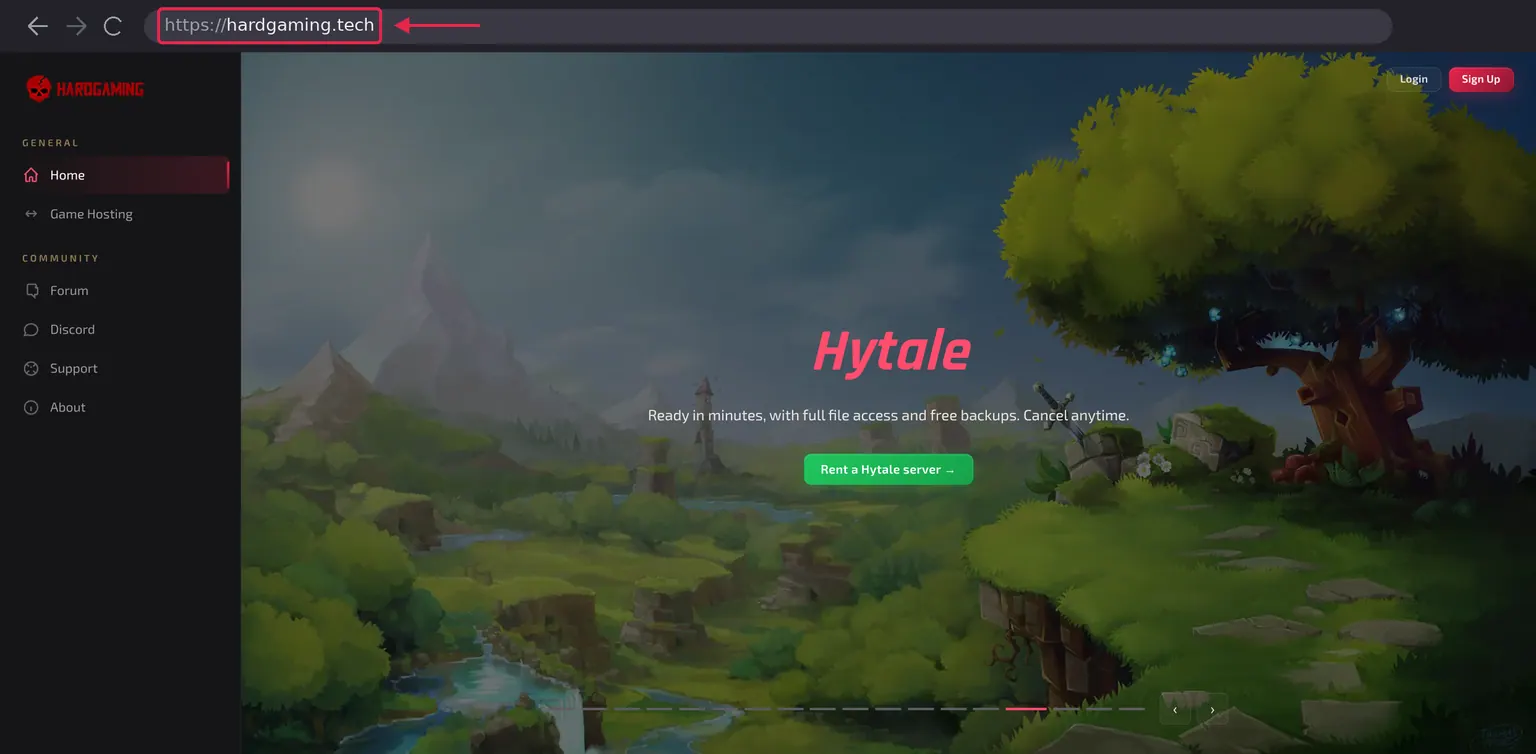
Go to hardgaming.tech and sign in. To skip the browsing, open Hytale server hosting and continue from Step 4.
Step 2: Select Game Hosting
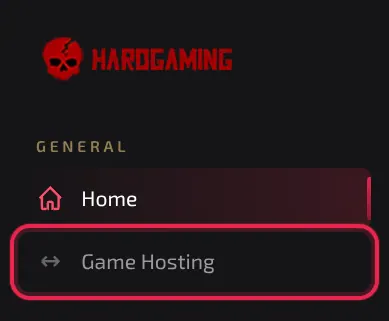
In the sidebar on the left, click Game Hosting.
Step 3: Select the Hytale Tile
The grid lists every game HardGaming hosts. Click the Hytale tile.

Step 4: Choose a Plan
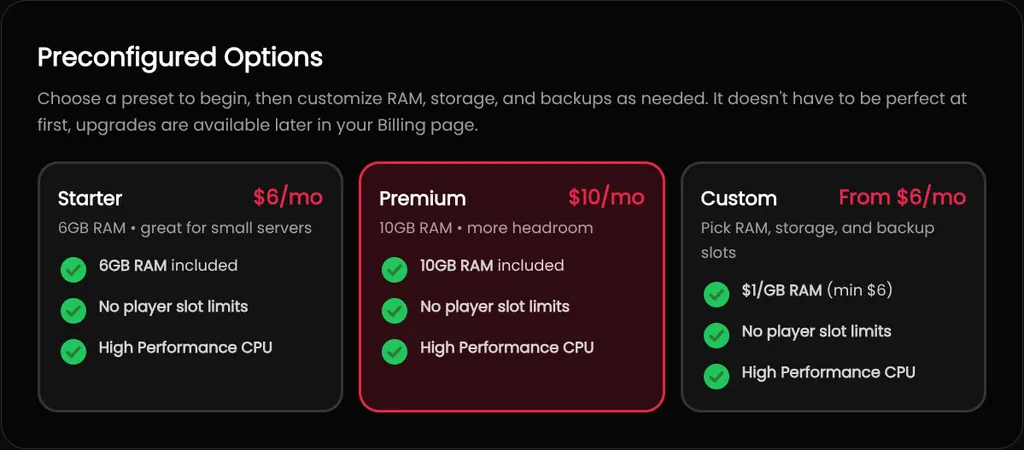
Three presets are offered, and Premium is selected for you. Click the one you want.
- Starter, $6 a month, includes 6GB of RAM. Enough for a small group.
- Premium, $10 a month, includes 10GB of RAM. More headroom for a bigger world and more players.
- Custom, from $6 a month, lets you pick RAM, storage and backup slots yourself.
Note: Prices are subject to change. The plan cards on hardgaming.tech always show the current price, so check them before you click.
Step 5: Adjust Memory and Storage
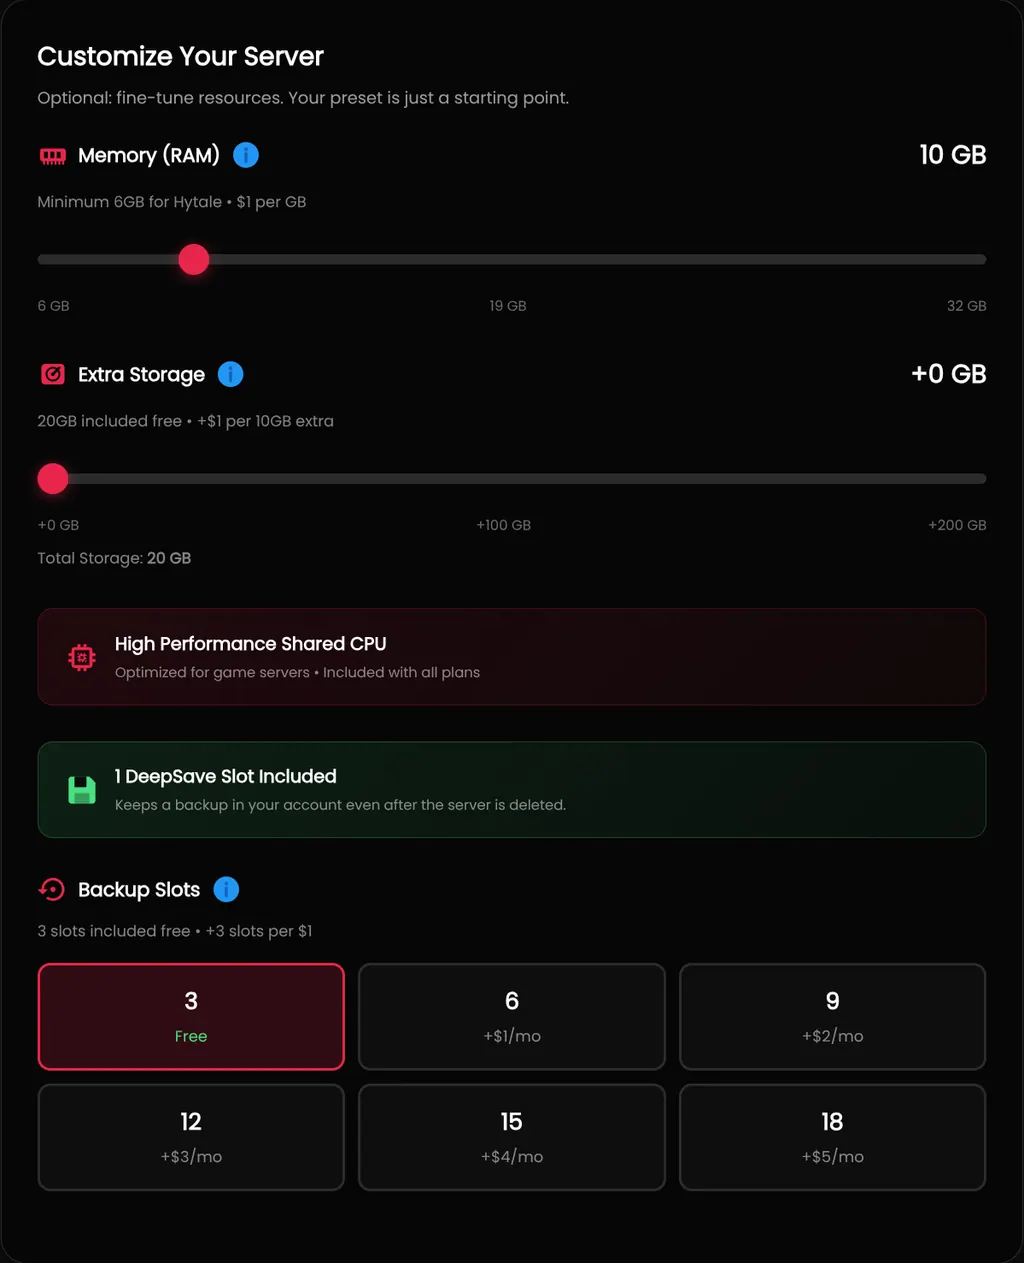
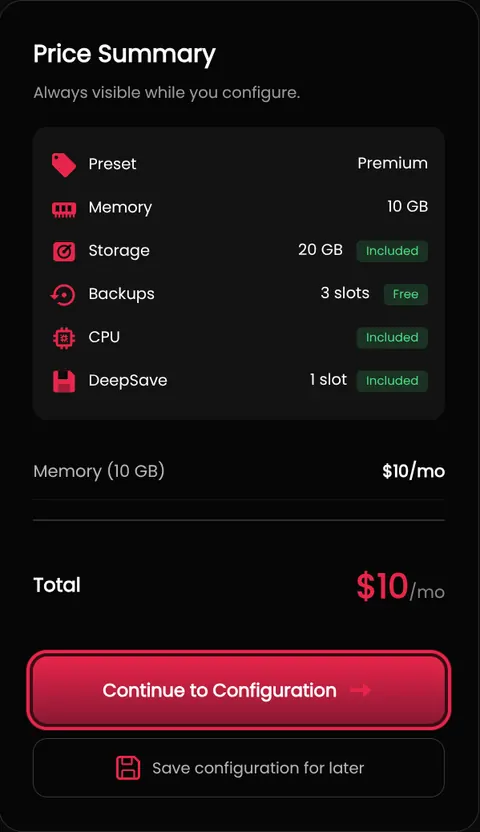
The preset is a starting point, and this whole section is optional. Drag Memory (RAM) to change how much memory the server gets, at $1 per GB. Hytale needs at least 6GB here.
Extra Storage adds to the 20GB that every plan includes, at $1 for each extra 10GB. Backup Slots start at three for free, and each extra $1 a month adds three more.
Every plan also includes one DeepSave slot, which keeps a backup in your account even after the server is deleted. Our DeepSave guide covers how to use it.
Step 6: Check the Price and Continue
Price Summary on the right updates as you change anything, so the total there is what you will be charged each month. When it reads what you expect, click Continue to Configuration.
Step 7: Name Your Server
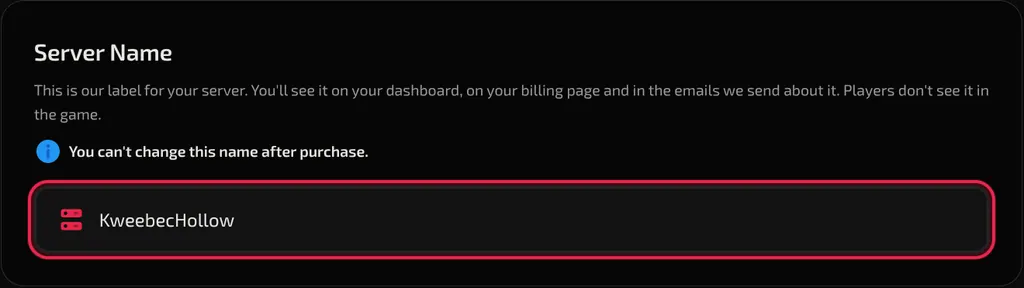
Type a name into Server Name at the top of the page. This is how your server appears on your HardGaming dashboard, on your billing page and in our emails. Players do not see it in the game.
It is the one required field on this page, and you cannot change it after you pay.
Step 8: Leave Auth Mode on Authenticated
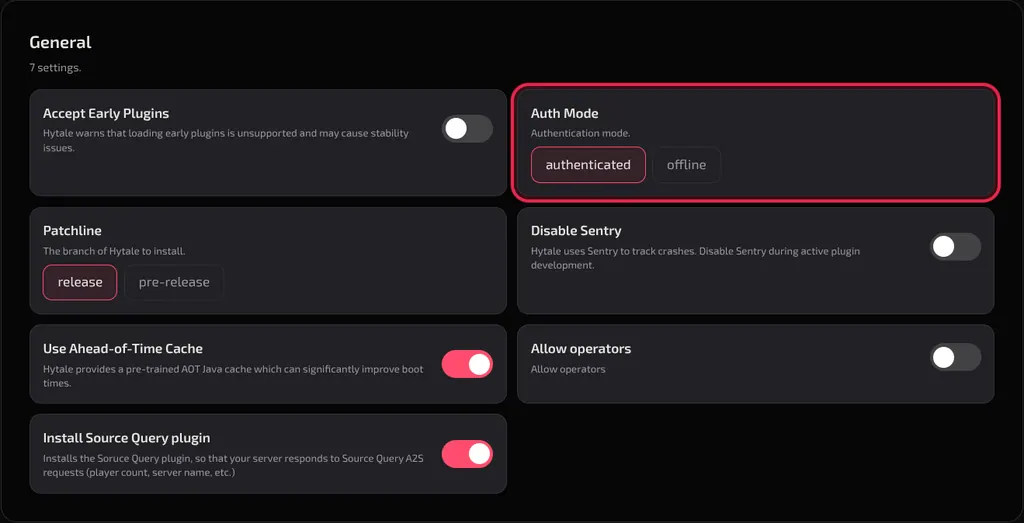
The General section holds seven settings, and every one has a working default. The one Hytale players ask about is Auth Mode, which is set to authenticated. Leave it there. Why Does a Hytale Server Need Your Account? explains what it does.
Every setting is listed in Hytale Server Settings below, and all of them can be changed later.
Step 9: Review Your Configuration
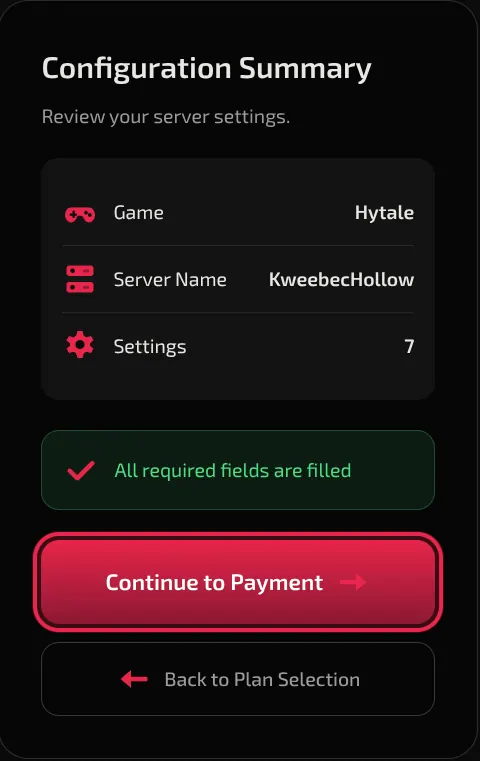
Configuration Summary on the right lists your game, server name and how many settings you have. It reads All required fields are filled once the server name is set. Click Continue to Payment.
Step 10: Enter Your Payment Details
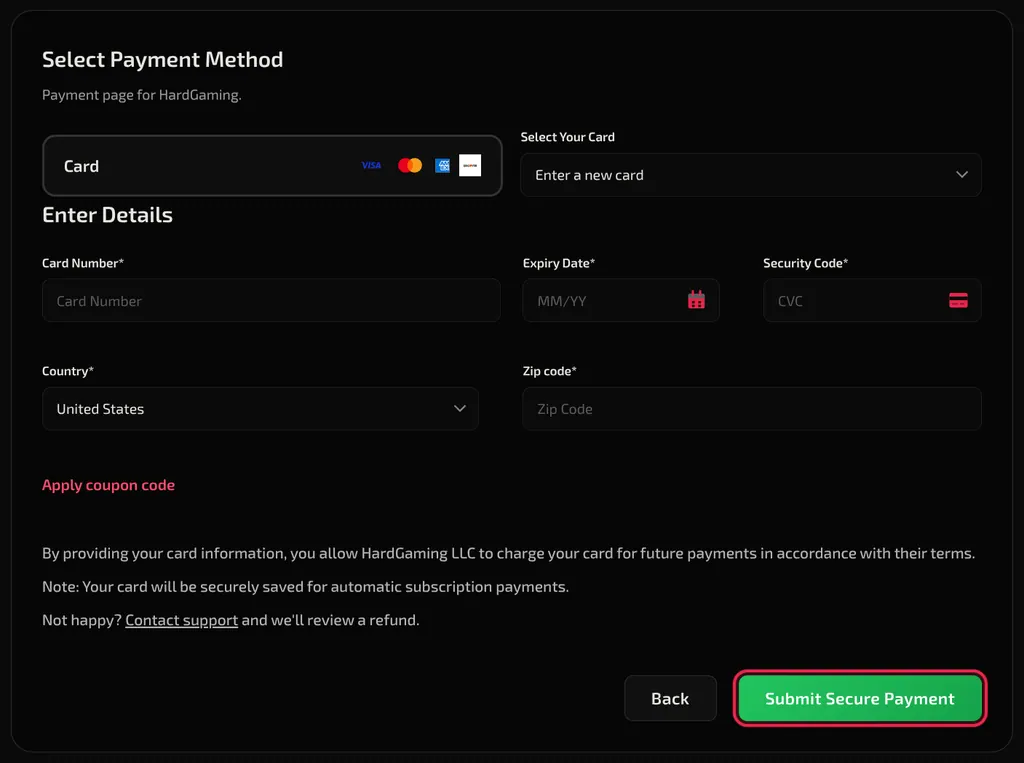
Leave Select Your Card on Enter a new card, or pick a card you have used before. Fill in Card Number, Expiry Date, Security Code, Country and Zip code, then click Submit Secure Payment.
Warning: Your card is saved and charged every month until you cancel the server from your Billing page.
Step 11: Open the Sign-In Link
Payment takes you straight to your new server. The notice Your server is installing. Some tabs unlock automatically when setup finishes. appears while it sets up, and the Console tab streams every line.
Once the installer finishes, STATUS changes to starting and the console prints a link under Please visit the following URL to authenticate:, followed by an Authorization code. Open that link in your browser and sign in to your Hytale account if it asks. The server waits at starting until you approve it, and each code lasts about ten minutes.

Step 12: Approve the Server
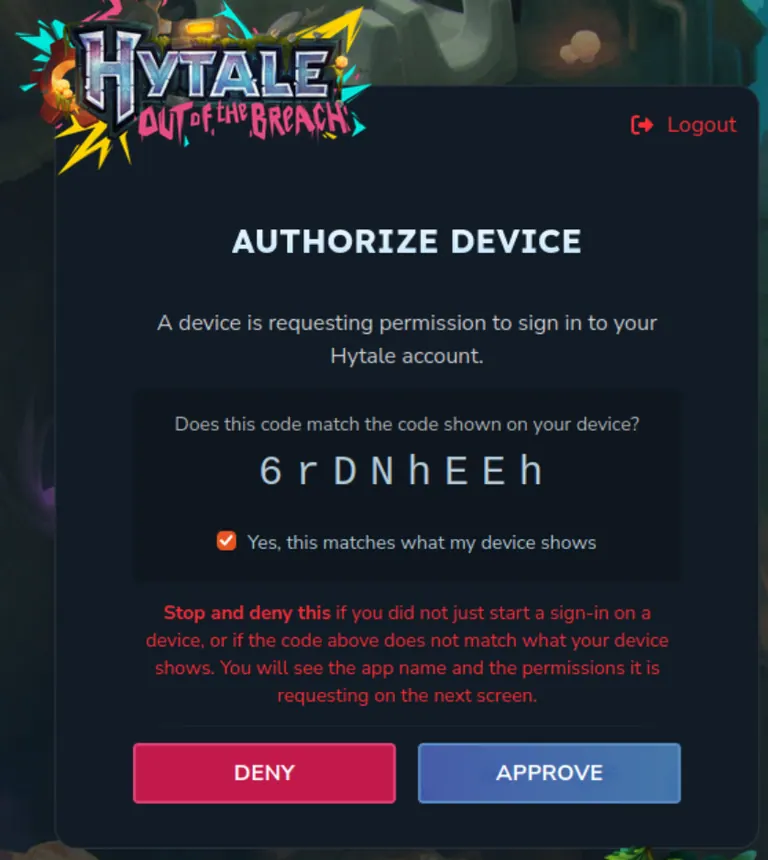
The link opens AUTHORIZE DEVICE on Hytale's own site. Check that the code it shows matches the Authorization code in your console, tick Yes, this matches what my device shows, and click APPROVE. That is all Hytale asks for, so you can close the tab.
Warning: Click DENY instead if you did not start this server yourself, or if the codes do not match. Approving gives that device access to your Hytale account.
Step 13: Confirm Your Server Is Running
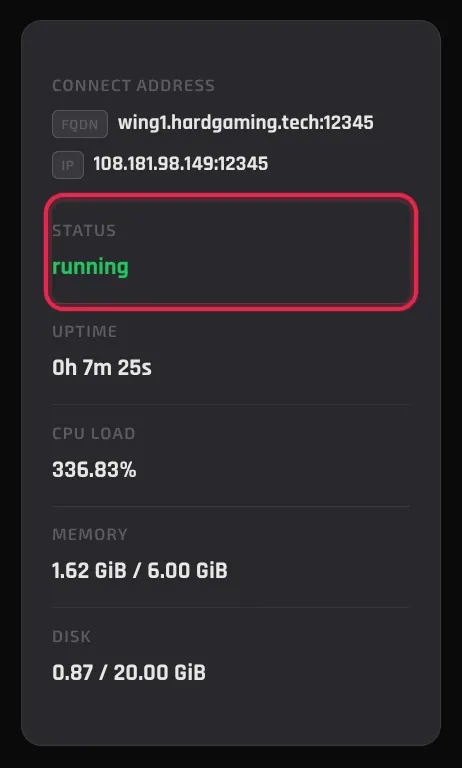
Go back to your server page. Once you approve, the server downloads Hytale and starts up by itself, and the Console tab ends with Hytale Server Booted!. STATUS on the right then reads running.
CONNECT ADDRESS above it holds the address your friends need, as a hostname and as an IP, each with its port.
Step 14: Join Your Server
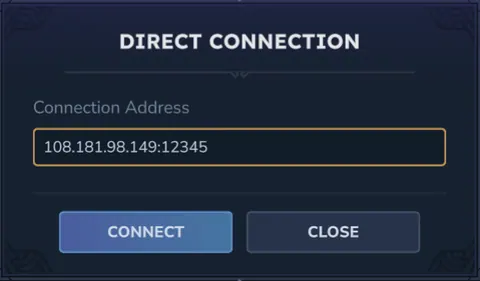
In Hytale, open SERVERS from the top menu and click DIRECT CONNECTION at the bottom of the list. Type your connect address into Connection Address, including the port after the colon, and click CONNECT.
Why Does a Hytale Server Need Your Account?
Because Hytale requires it. Hypixel Studios, the studio behind Hytale, says in its Hytale Server Manual that servers "require authentication to enable communication with our service APIs and to counter abuse."
That is what Auth Mode controls. On authenticated, the default, the server signs in through your Hytale account.
Hytale Server Settings
Every setting in the General section, with the default it ships with and the description the page gives it.
| Setting | What it does | Default |
|---|---|---|
| Accept Early Plugins | Hytale warns that loading early plugins is unsupported and may cause stability issues | off |
| Auth Mode | Authentication mode | authenticated |
| Patchline | The branch of Hytale to install | release |
| Disable Sentry | Hytale uses Sentry to track crashes. Disable Sentry during active plugin development | off |
| Use Ahead-of-Time Cache | Hytale provides a pre-trained AOT Java cache which can significantly improve boot times | on |
| Allow operators | Allow operators | off |
| Install Source Query plugin | Makes your server respond to Source Query A2S requests, such as player count and server name | on |
Note: All seven appear again on the Startup tab once your server exists, along with Source Query Port. That one defaults to your game port plus one.
Troubleshooting
Server stuck on starting?
- It is waiting for your approval. Open the Console tab and look for Please visit the following URL to authenticate:.
- Open the link under it, sign in to your Hytale account, and approve the request.
Sign-in link stopped working?
- Each code lasts about ten minutes. When it runs out, the console prints
error obtaining token: context deadline exceededand STATUS briefly readsoffline. - The server starts again by itself and prints a new link and Authorization code. Use the newest one in the Console tab, not one you copied earlier.
Console says No server tokens configured?
- It ends the startup log with No server tokens configured. Use /auth login to authenticate. Your server is still running, and players can still join it through DIRECT CONNECTION.
Will a restart ask for approval again?
- No. Once approved, a restart goes straight back to
runningwithout a new link.
Configuration Summary says Please fill all required fields?
- Server Name at the top of the page is empty. It is the only required field, and the page shows Server name is required under it until you fill it in.
Best Practices
- Choose your server name before you pay. It cannot be changed afterwards.
- Leave Patchline on release unless your whole group plays the pre-release branch.
- Make a DeepSave before you install plugins or change the world.
Next Steps
Your server now appears under My Servers on your dashboard, and it stays there between sessions. Click MANAGE SERVER on its card any time to restart it, change a setting, or pull a backup.
- Find your way around the server dashboard
- Protect your world with DeepSave
- Browse all Hytale guides
- Hytale server hosting
Explore Orbis with your whole group on Hytale server hosting, or browse every game we host.
Need Help?
If you run into any issues, the HardGaming support team is here for you:
- Forum: ask the community and search past answers
- Email: support@hardgaming.tech
- Live Chat: use the chat widget on hardgaming.tech
- Discord: join our community for quick help
Happy gaming! 🎮