Valheim: How to Set Up a Server
Table of Contents
Follow this guide to set up a Valheim server on HardGaming, from picking a plan to a running world your friends can join. Every step happens in your browser, and Xbox players can join too once you turn on crossplay.
Before You Start
- A HardGaming account. Create one at hardgaming.tech first. You need to be signed in to reach the Payment step.
- A payment method. Your card is entered at the last step and saved for the monthly subscription.
- A PC (Steam) dedicated server. Xbox players can join too if you turn on Enable Crossplay in Step 6.
- Nothing to install. Every step happens in your browser.
- Your settings are not final. Everything in Step 6 and Step 7 can be changed again after the server exists.
Step 1: Open the HardGaming Website
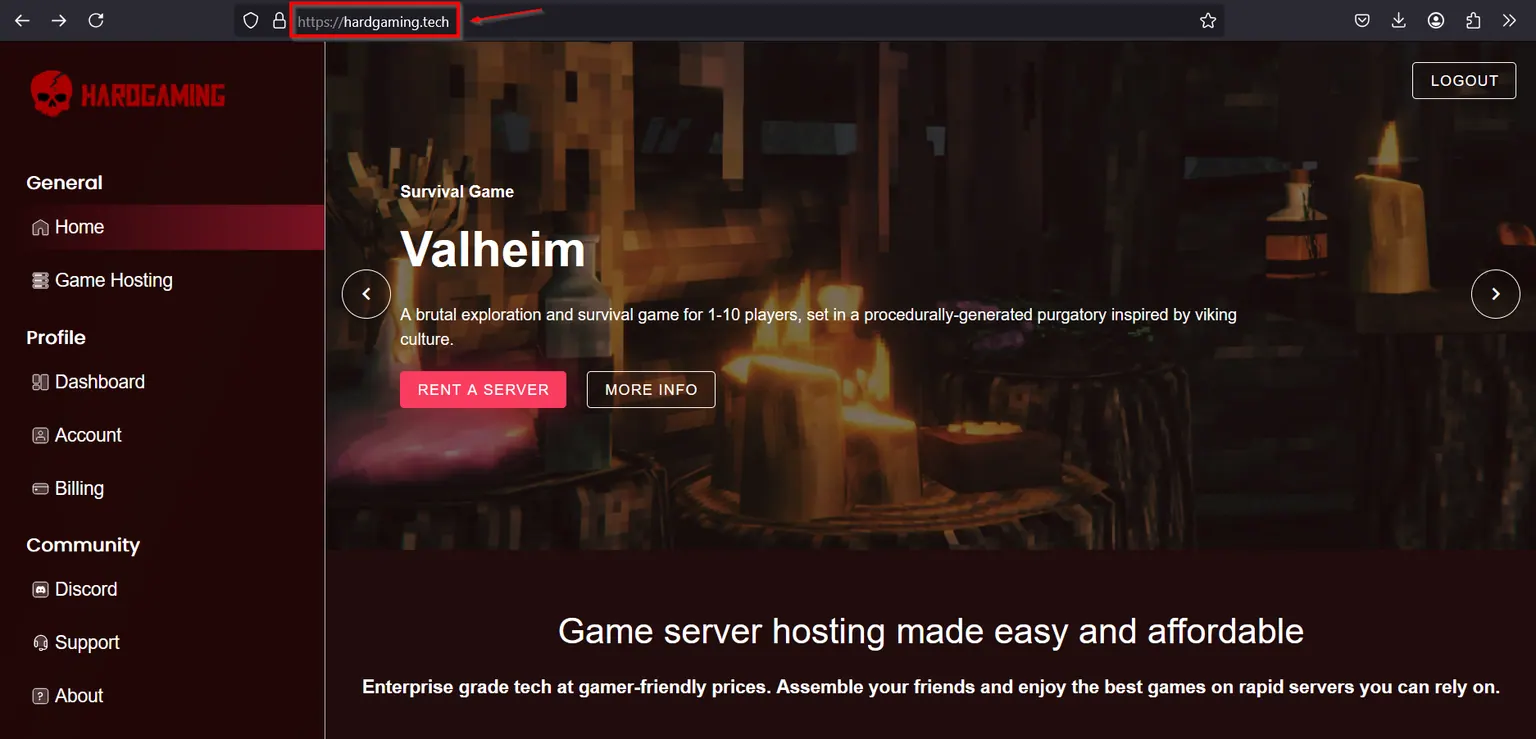
Go to hardgaming.tech and sign in. If you would rather skip the browsing, go straight to Valheim server hosting and continue from Step 4.
Step 2: Select Game Hosting
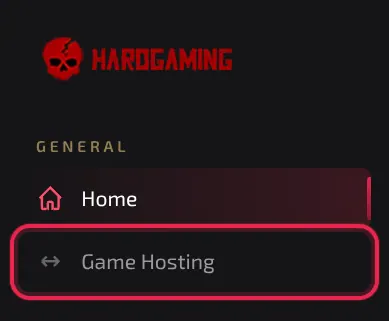
In the sidebar on the left, click Game Hosting.
Step 3: Select the Valheim Tile
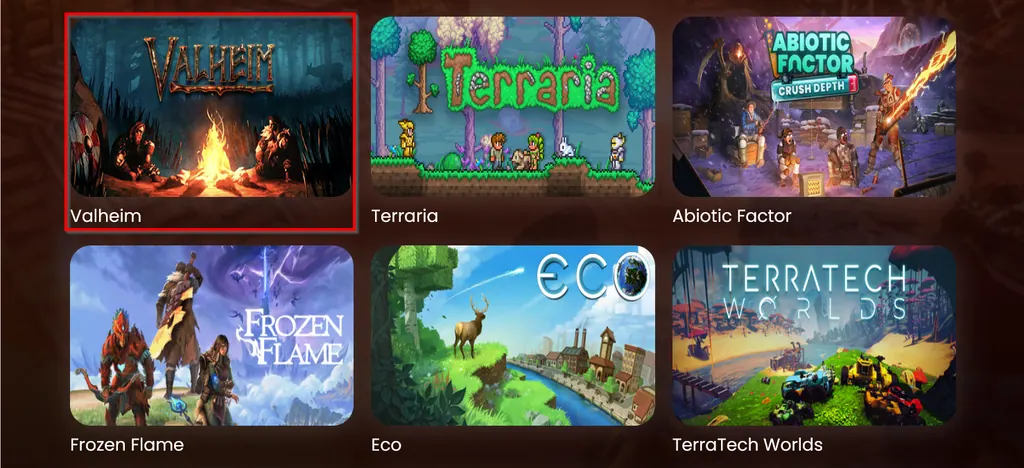
The grid lists every game HardGaming hosts. Click the Valheim tile.
Step 4: Choose a Plan
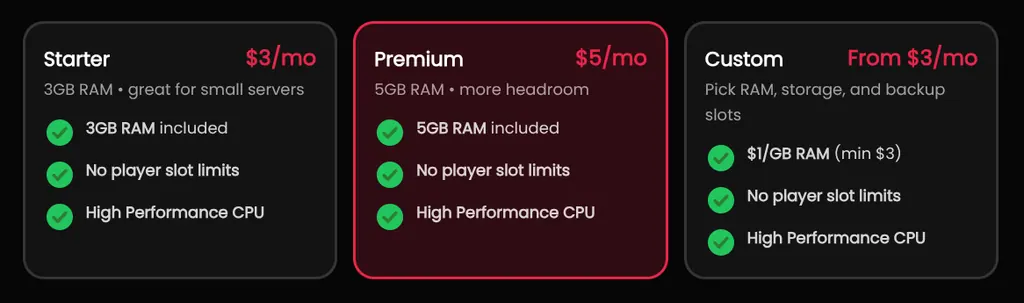
Three presets are offered, and Premium is selected for you. Click the one you want.
- Starter, $3 a month, includes 3GB of RAM. Enough for a small world with a few friends.
- Premium, $5 a month, includes 5GB of RAM. More headroom for a busier world.
- Custom, from $3 a month, lets you pick RAM, storage and backup slots yourself.
Valheim needs at least 3GB, and memory is charged at $1 per GB. No plan limits how many players can join.
Step 5: Name Your Server
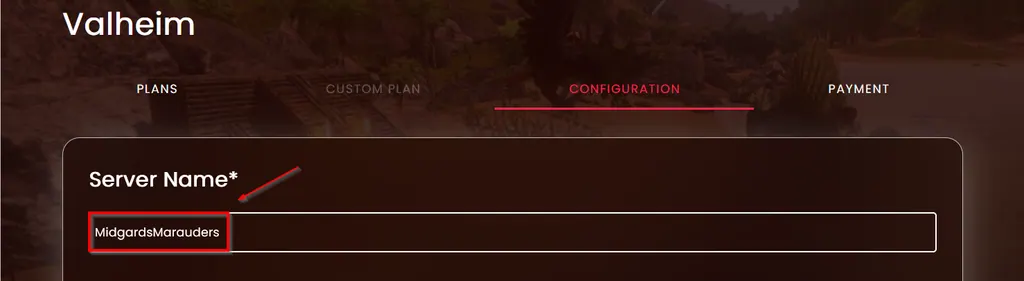
Type a name into Server Name. It is marked required, and it is the name you will see in your dashboard.
Step 6: Set Your Basic Server Options
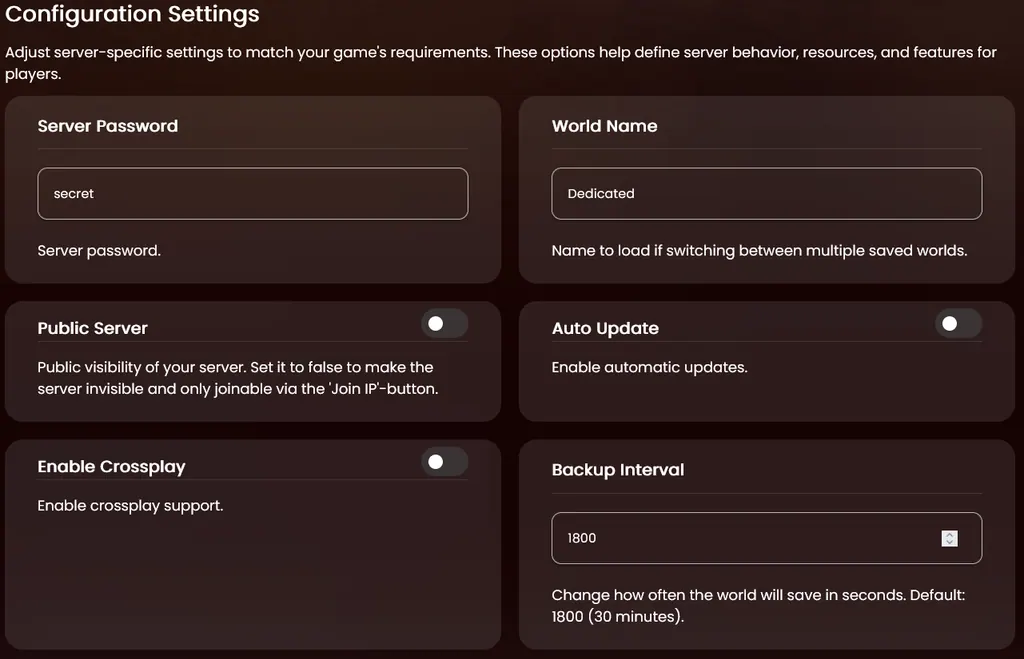
The Configuration Settings panel holds nine fields across two screens. The full list is in Valheim Server Settings below.
Server Password makes the world private, and leaving it empty lets anyone with your address join. Turn on Enable Crossplay if you want Xbox players in your Steam world.
Step 7: Set Your Backup Schedule
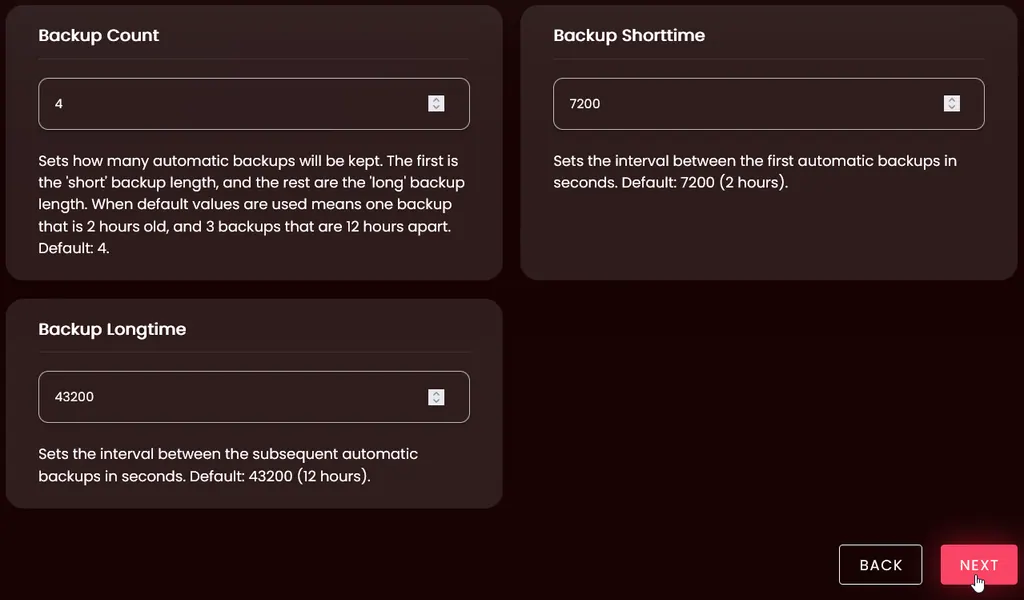
Backup Count, Backup Shorttime and Backup Longtime set how many backups your server keeps and how often it makes them. Each field lists its own default.
Every plan also includes one DeepSave slot, which keeps a copy in your account even after the server is deleted. Our DeepSave guide covers how to use it.
Once you are done, click Next. You can change every setting on this screen again later.
Step 8: Enter Your Payment Details
Leave Select Your Card on Enter a new card, or pick a card you have used before. Fill in Card Number, Expiry Date, Security Code, Country and Zip code, then click Submit Secure Payment.
Warning: Your card is saved and charged every month until you cancel the server from your Billing page.
Step 9: Confirm Your Server Is Running
Payment takes you straight to your new server. The Console tab streams the install while Valheim downloads and unpacks, and the other tabs unlock once it finishes. Watch STATUS on the right. It reads offline while the install runs, then running once your world is up. CONNECT ADDRESS holds the FQDN and IP your friends need to join.
Can Xbox Players Join My Valheim Server?
Yes. Valheim supports crossplay between Steam and Xbox, so turning on Enable Crossplay during Configuration lets players on both platforms share one world. Valheim's own crossplay FAQ covers how a crossplay-enabled server identifies and manages players across platforms.
Valheim Server Settings
Every field in Configuration Settings, with the default it ships with where one is shown on screen.
| Setting | What it does | Default |
|---|---|---|
| Server Password | The password required to join the server | |
| World Name | The name of the world, used as the save file name | |
| Public Server | Toggle on to make the server visible in the public server list | |
| Auto Update | Toggle on to update the server automatically on start | |
| Enable Crossplay | Toggle on to allow Xbox players to join alongside Steam players | |
| Backup Interval | How often the world saves, in seconds | 1800 (30 minutes) |
| Backup Count | How many backups to keep. The first covers the short interval, the rest the long interval | 4 |
| Backup Shorttime | The interval before the first automatic backup, in seconds | 7200 (2 hours) |
| Backup Longtime | The interval between the backups after that, in seconds | 43200 (12 hours) |
Applying a Coupon Code
If you have a coupon, apply it before you pay. On the payment page, click Apply Coupon Code, type your code, and click Submit to apply it.
Troubleshooting
Can't click Next?
- Server Name is marked required with an asterisk. Fill it in on the Configuration tab before you continue.
Server still shows offline after paying?
- It is still installing. The Console tab shows the download and unpack running line by line.
- Wait for STATUS to change to
runningbefore you connect.
Friends cannot join?
- Check STATUS reads
running. An offline or installing server refuses connections. - Give them the address from CONNECT ADDRESS, including the port.
- If you set a Server Password, they need it to get in.
- Xbox friends need Enable Crossplay turned on. Without it, only Steam players can join.
Best Practices
- Set a Server Password unless you want the world open to anyone with your address.
- Turn on Enable Crossplay before your first Xbox friend tries to join.
- Leave Auto Update on so your server always matches the client version your friends run.
- Keep Public Server off unless you want strangers finding your world in the public server list.
Next Steps
Your server now appears under My Servers on your dashboard, and it stays there between sessions. Open it any time to restart it, edit settings, or pull a backup.
- Protect your world with DeepSave
- Browse all Valheim guides
- Guides for every game we host
- Valheim server hosting
Need Help?
If you run into any issues, the HardGaming support team is here for you:
- Live Chat: use the chat widget on hardgaming.tech
- Discord: join our community for quick help
- Email: support@hardgaming.tech
Happy gaming! 🎮